
A well-placed and functional dryer vent ensures that your dryer operates efficiently, reduces energy consumption, and prevents fire hazards. When a dryer vent is poorly routed or clogged, it can cause overheating, longer drying times, and even moisture buildup within your home. To improve safety and enhance dryer performance, rerouting the dryer vent is essential for ensuring proper airflow, reducing lint accumulation, and extending the life of your appliance. Following a structured approach to rerouting the dryer vent will help you achieve a cleaner and safer home environment.
Why Rerouting a Dryer Vent Is Necessary?
Rerouting a dryer vent is important to prevent common issues like lint buildup, inefficient drying, and excess humidity in your living space. Over time, vents that take an inefficient route can become clogged with lint, leading to reduced airflow, higher energy bills, and increased fire risks. Moisture-laden air from the dryer can also contribute to mold growth and water damage inside your walls if not properly ventilated. By rerouting the dryer vent, you create a more efficient pathway for exhaust air, reducing wear on your dryer and lowering maintenance costs.
Step 1: Assess the Current Dryer Vent Setup and Plan Rerouting
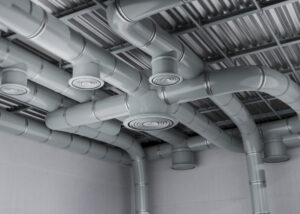
Begin by thoroughly evaluating your existing dryer vent path to determine its efficiency and safety. Look for excessive bends, long duct runs, or obstructions that may hinder proper airflow. If your vent currently passes through walls, ceilings, or attics unnecessarily, rerouting it to a more direct path will significantly enhance its function. Additionally, ensure that the exterior vent is placed in a location where airflow is unrestricted by landscaping, screens, or other barriers. Planning an optimized route minimizes lint buildup and maximizes ventilation performance, helping your dryer operate at peak efficiency.
Step 2: Gather the Right Tools and Materials for the Job
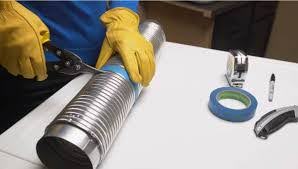
Before starting the rerouting process, collect all necessary tools and materials to ensure a smooth and efficient installation. You will need a high-quality vent hose, preferably a rigid or semi-rigid metal duct, which offers better durability and airflow than flexible plastic hoses. Essential tools include a screwdriver, a power drill, vent clamps, aluminum foil tape, tin snips, and a vent cap for the exterior. Having the right supplies prevents delays and ensures a secure, airtight vent connection. Consider investing in a vent brush or cleaning kit to remove any accumulated lint from the dryer and old duct before installation.
Step 3: Disconnect the Dryer and Remove the Old Venting System
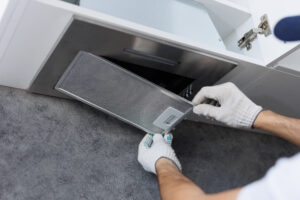
Before working on the vent system, unplug the dryer and carefully move it away from the wall to access the venting components. Gently detach the vent hose from the dryer and exterior wall connection, taking care to inspect for lint buildup or damage. If your old venting system was made of flexible foil or plastic tubing, replacing it with a rigid duct will greatly improve efficiency and reduce fire hazards. Clean out any lint or debris from the dryer’s exhaust port and surrounding area before proceeding to install the new venting system. Ensuring a clean starting point will help prevent airflow issues and enhance performance.
Step 4: Install the New Rerouted Vent System for Maximum Efficiency
Measure and cut the new ducting material to match the optimized route, reducing the number of bends to ensure smooth airflow. Secure the vent hose to the dryer and the exterior vent hood using sturdy clamps, ensuring there are no loose connections. Use aluminum foil tape to seal joints and prevent air leaks, which can cause lint to accumulate inside walls or other hidden spaces. Make sure the exterior vent cap is properly positioned to allow unrestricted airflow and prevent pests from entering. A properly installed and rerouted dryer vent significantly reduces drying times, energy consumption, and potential safety hazards.
Step 5: Test the Rerouted Dryer Vent for Proper Functionality
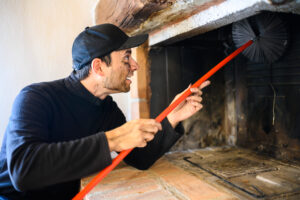
After installation, reconnect the dryer to the power source and run a drying cycle to ensure the vent is working properly. Check for any leaks by placing your hand near the duct connections to feel for escaping air. If you notice weak airflow, inspect the vent path for possible obstructions and make adjustments as needed. Regular maintenance, such as cleaning lint from the vent system every few months, will help maintain optimal performance and prevent dangerous lint buildup. By taking these precautions, you ensure your dryer operates efficiently while keeping your home safe from potential fire hazards.
How to move a dryer vent?
Moving a dryer vent requires careful planning to ensure proper airflow, safety, and efficiency. Start by identifying the best new location for the vent, ideally the shortest and most direct route to the outside. Disconnect the dryer and remove the existing vent duct, clearing any lint buildup for safety. Measure and install a new rigid or semi-rigid duct, securing it with clamps and aluminum foil tape to prevent leaks. Cut an exterior vent hole if needed, attach a vent hood, and seal gaps to prevent pests and moisture. Finally, reconnect the dryer, test airflow, and perform regular maintenance to ensure optimal performance.
Final Thoughts on Rerouting a Dryer Vent for Efficiency
Rerouting a dryer vent correctly improves safety, enhances dryer efficiency, and reduces the risk of hazardous lint accumulation inside your home. By following these detailed steps, you can create a more effective ventilation system that extends the lifespan of your dryer while lowering energy costs. Regular inspection and cleaning of your dryer vent system ensure consistent performance, preventing costly repairs and dangerous airflow blockages. Taking the time to reroute and maintain your dryer vent properly contributes to a safer and more efficient household environment.
Ensure your dryer runs efficiently and safely by moving the vent to an optimal location. Take action today for better airflow and energy savings! Need expert tips? Start your project now!